Flashing via CP2102 serial adapter (boards without USB)
Reading time: ~6 minutes · Execution time: ~15 minutes (wiring + flash) · Audience: anyone with a JoyReef dosing pump without a USB port, or who needs to recover a board that no longer responds
🔵 Advanced guide (technical) — this is the "plan B" of guide 16 — USB firmware install. You need it if: - Your dosing pump has no USB port on the board (some of the boards sold don't have one) - You need to recover a board that shows no signs of life after a failed update
If your board has a USB port, you don't need this guide: follow guide 16 directly.
1. What you are about to do
The dosing pump board is programmed through its serial port, which is normally hidden behind the USB chip. If there is no USB port, the serial port is exposed on 4 pins on the board: you connect a small USB-serial adapter (CP2102) to them, and from there the flash is identical to guide 16 — browser, the portal's /usb-flash page, two minutes of waiting.
The flow is:
- Buy a CP2102 adapter (once, ~€5)
- Connect 4 jumper wires between adapter and board
- Put the board in flash mode with the PROGRAM button
- Flash from the browser as in guide 16
- Disconnect everything and reassemble the dosing pump
💡 No fear: this is what every maker did before boards came with built-in USB. Four wires, one button, done. And if you get something wrong, nothing breaks: double-check the wires and try again.
2. What you need
- ✅ A CP2102 USB-serial adapter — found on Amazon/AliExpress by searching "CP2102 USB TTL", costs €4-7. A CH340 also works, but the CP2102 is the recommended one
- ✅ 4 female-female dupont wires (often included with the adapter)
- ✅ A PC with Chrome or Edge (as for guide 16: Web Serial doesn't work on Firefox/Safari)
- ✅ CP210x driver installed — same as in guide 16, section 2: on Linux it's already included, on Windows/macOS download it from silabs.com
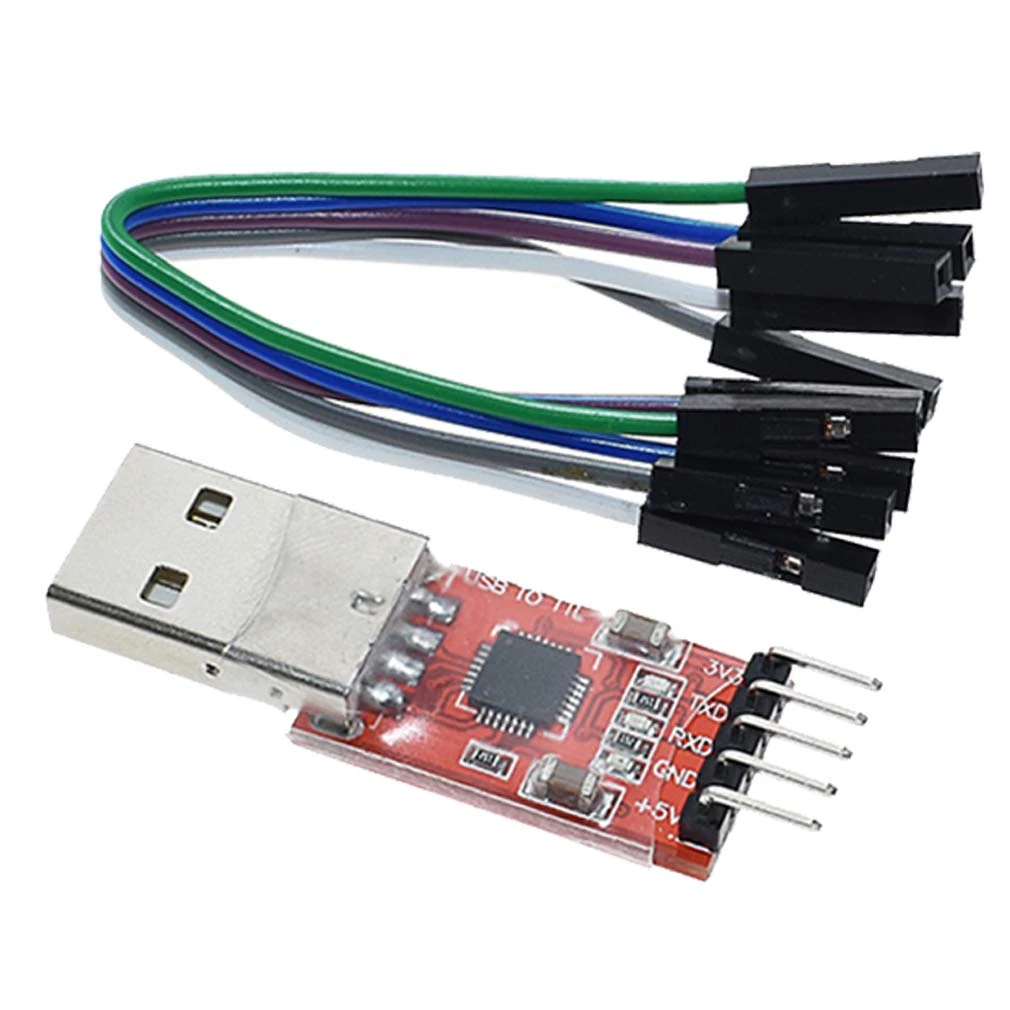
⚠️ Watch the voltage: the adapter in the photo has two separate power pins,
3V3and+5V— for our board use only the3V3. Connecting the+5Vto the board's 3V3 pin can damage it. (On other models the voltage is selected with a jumper: it must be on 3.3V.)
3. Find the pins on the board
On the dosing pump board there are 4 pins dedicated to the serial port — 3V3, GND, TX, RX — and a PROGRAM button.
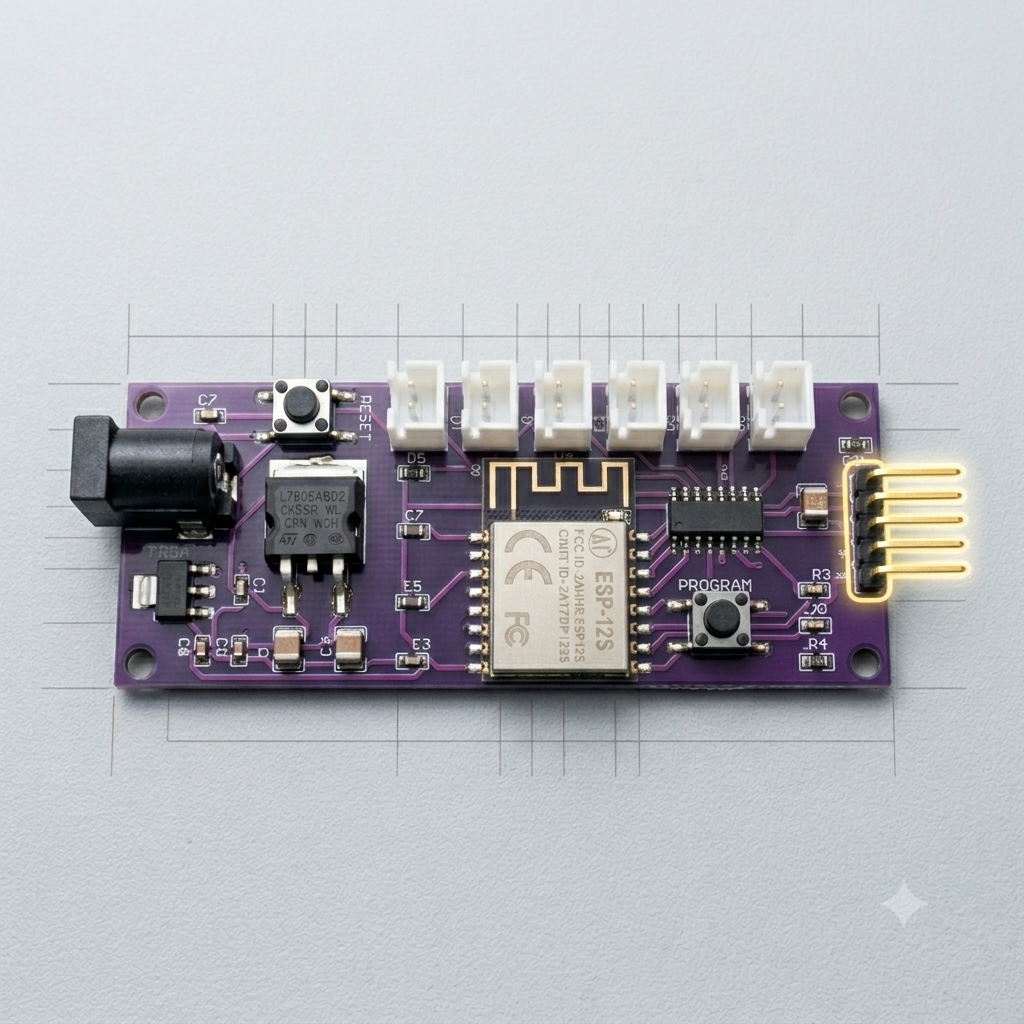
💡 Which button? There are two buttons on the board: the one you need, PROGRAM, is the one near the programming pin header (right edge). The other one, near the power jack, has nothing to do with flashing.
⚠️ Board powered off: before touching the pins, disconnect the dosing pump from power. During the flash the board will be powered by the adapter through the 3V3 pin — it must never be powered by two sources at the same time.
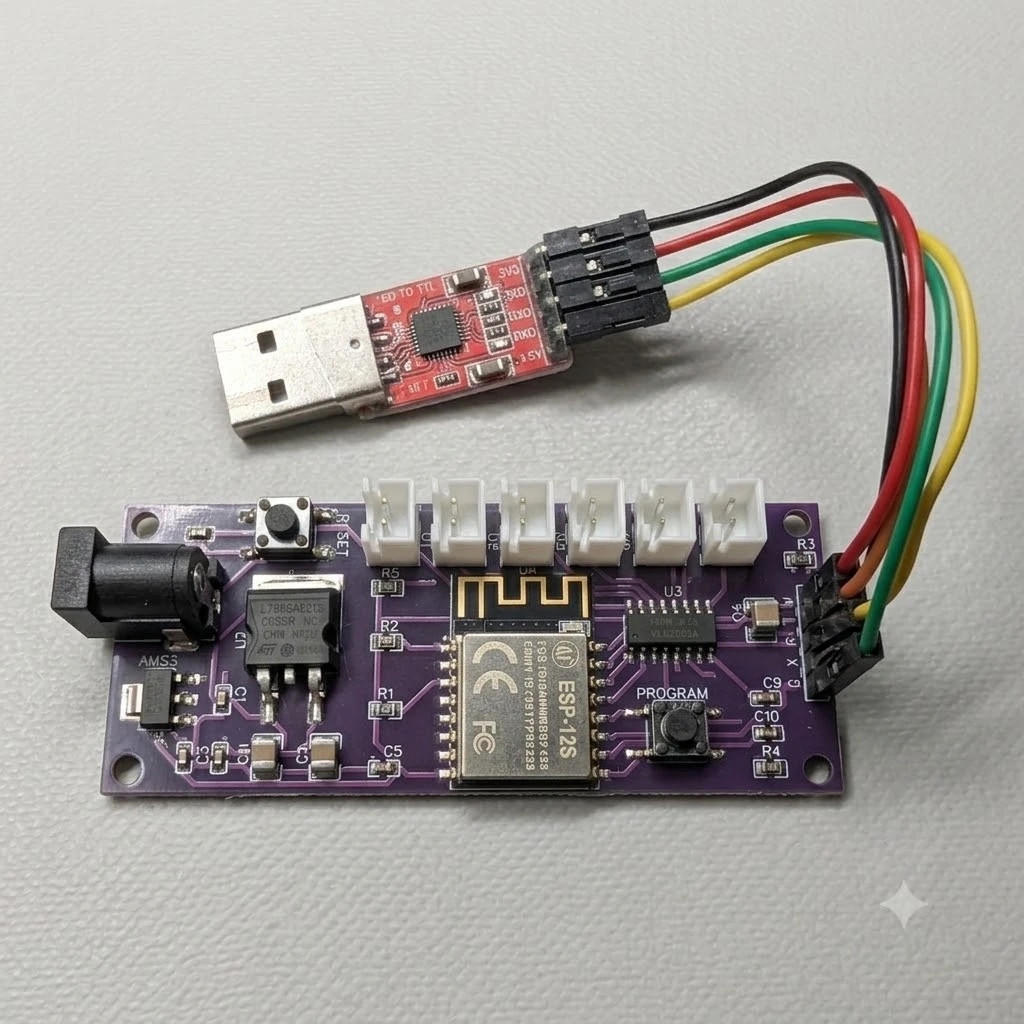
4. Connect the wires
Four connections, two of them crossed:
| CP2102 adapter | Doser board | |
|---|---|---|
3V3 |
3V3 |
straight |
GND |
GND |
straight |
TXD |
RX |
crossed |
RXD |
TX |
crossed |
The logic of the crossing: what the adapter transmits (TX) the board must receive (RX), and vice versa. It's the number one mistake of anyone doing this for the first time — if the flash doesn't start, 90% of the time it's because TX and RX are straight instead of crossed.
5. Put the board in flash mode
The board accepts new firmware only if it powers up in "programming mode". Here's how:
- Hold down the PROGRAM button on the board (the one next to the pin header, see photo in sec. 3)
- With the button held, plug the CP2102 adapter into the PC's USB port (this is what powers the board)
- Wait 2 seconds and release the button
The board is now waiting for the firmware. You won't see LEDs blinking or any other signal: that's normal, it's simply listening on the serial port.
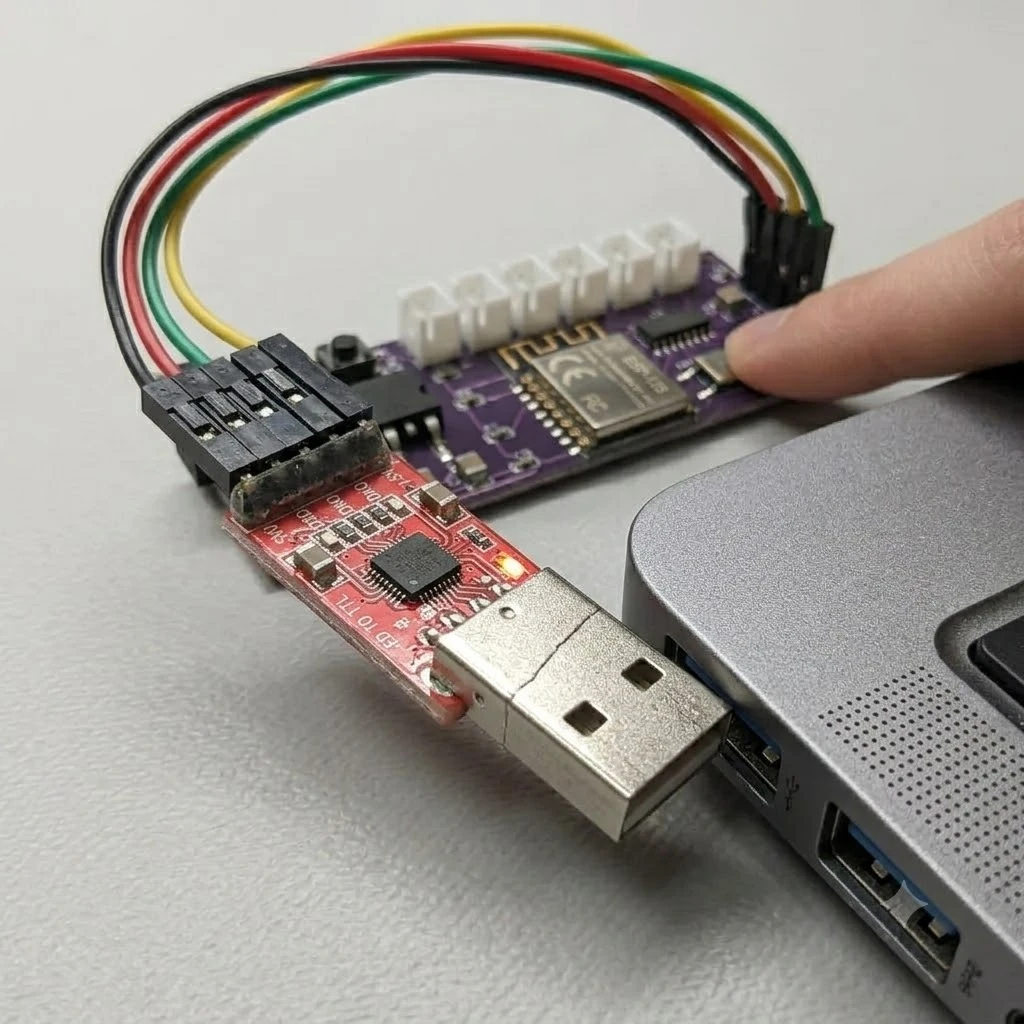
💡 Got the sequence wrong? No problem: unplug the adapter from the PC and repeat from step 1. The sequence only matters at power-up.
6. Flash from the browser
From here on the procedure is identical to guide 16:
- Open portal.joy-reef.com/usb-flash in Chrome or Edge
- Choose the Dosing Pump firmware
- Click "Install" / "Connect and flash"
- In the serial port window choose "Silicon Labs CP210x"
- Wait for completion (2-3 minutes, progress bar)
⚠️ Flash starts and stops halfway? It's almost always the power supply: the 3V3 pin of some cheap adapters doesn't deliver enough current. Try another USB port on the PC (the rear ones on a desktop are best), avoid passive USB hubs, or try another adapter.
7. After the flash
- Unplug the adapter from the PC and disconnect the 4 wires
- Reassemble the dosing pump and power it normally
- Within 30 seconds the WiFi network
joyreef-XXXXXXwill appear: the firmware is installed and waiting for configuration
➡️ Continue with guide 03b — Firmware flash and WiFi connection to connect the dosing pump to your network and the portal.
8. Troubleshooting
| Symptom | Probable cause | Solution |
|---|---|---|
| The browser sees no port | CP210x driver missing | Install the driver from silabs.com, restart the PC |
| The port is there but the flash doesn't start | TX/RX straight instead of crossed | Swap the TX and RX wires |
| Flash doesn't start (wires ok) | Board not in flash mode | Repeat the sequence: PROGRAM held → plug in USB → release |
| Flash stops halfway | Insufficient 3V3 power | Another USB port, no hubs, another adapter |
No joyreef-XXXXXX network after the flash |
Flash not completed | Repeat from step 5; check the jumper is on 3.3V |
💡 This procedure always works, even on a board that seems "dead" after a failed update: the flash mode activated by the PROGRAM button doesn't depend on the installed firmware. That's why this guide is also the official recovery procedure.