Firmware Flash and WiFi Connection
Reading time: ~10 minutes · Execution time: 15-20 minutes · Applies to: Controller, Doser, Fish Feeder, pH
This guide describes the firmware loading and WiFi connection process, which is the same for all JoyReef devices. Follow your device-specific guide for prerequisites, then come back here to complete the installation.
1. Load the firmware onto the device
What you need:
- ✅ A computer (Windows, macOS, or Linux) — not a phone
- ✅ Google Chrome or Microsoft Edge (Safari and Firefox do not work for this operation)
- ✅ The micro-USB data cable from the shopping list (must pass data, not just power)
- ✅ A JoyReef account already created at portal.joy-reef.com
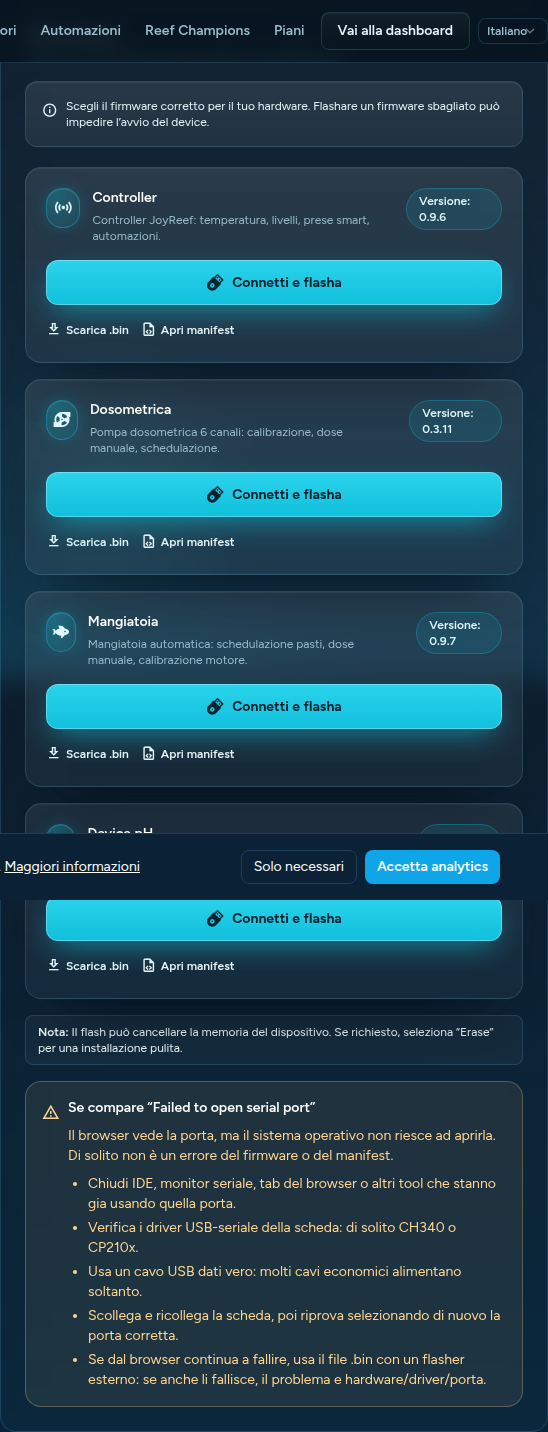
Step 1: open the flash page
Open portal.joy-reef.com/usb-flash in Chrome or Edge.
You will see the list of available firmware: Controller, Doser, Fish Feeder, pH. Choose the one matching the device you are installing.
Step 2: connect the device to the computer
- Take the micro-USB data cable
- Connect one end to the micro-USB port of the device and the other to the computer
- A LED will light up on the device (power indicator — this is normal)
Step 3: start the flash
- Click the "Install" button next to your device's firmware
- The browser opens a window to choose the serial port
- Select your device's port — usually named "USB-SERIAL CH340" or "Silicon Labs CP210x". If you see multiple ports, disconnect the USB cable, see which one disappears, reconnect and select it
- Confirm "Connect"
- The flash starts — it takes about 2-3 minutes, you will see a progress bar
- When finished, the device reboots by itself
⚠️ Missing USB driver? If the browser shows no serial port, on Windows or macOS you may need to install a driver. Search for "CH340 driver Windows" or "CP2102 driver macOS" (both free). On Linux it works without installing anything.
💡 "Connection failed" error? Disconnect the USB cable, wait 5 seconds, reconnect and try again.
2. Verify that the flash was successful
A few seconds after the flash finishes, the device reboots. To check that everything went well, look for the WiFi network joyreef-XXXXXX in your phone or PC's network list within 20-30 seconds.
If the network appears, the flash was successful and the device is in setup mode. Move on to the next section.
💡 If the
joyreef-XXXXXXnetwork does not appear after 30 seconds, disconnect the USB cable, wait 5 seconds, reconnect and try again. If the problem persists, repeat the flash from the beginning.
3. Connect the device to your home WiFi
Step 1: connect to the device's network
From your phone (or PC):
- Go to WiFi settings
- Look for the network
joyreef-XXXXXX(same code you see in the device name during flash) - Connect — no password is usually required
💡 "Internet not available"? This is normal. The device is not yet connected to the Internet. On Android confirm "Stay connected", on iPhone "Keep connection".
💡 Disable mobile data before continuing: if your phone has both the device's network and mobile data active, it may prefer mobile data and fail to open the wizard correctly.
Step 2: open the configuration wizard
Many phones automatically open the wizard page (like hotel WiFi portals). If it opens by itself, go directly to Step 3.
Otherwise:
- Open your phone's browser (Chrome, Safari, Edge — any works)
- Type in the address bar:
192.168.4.1and press Go
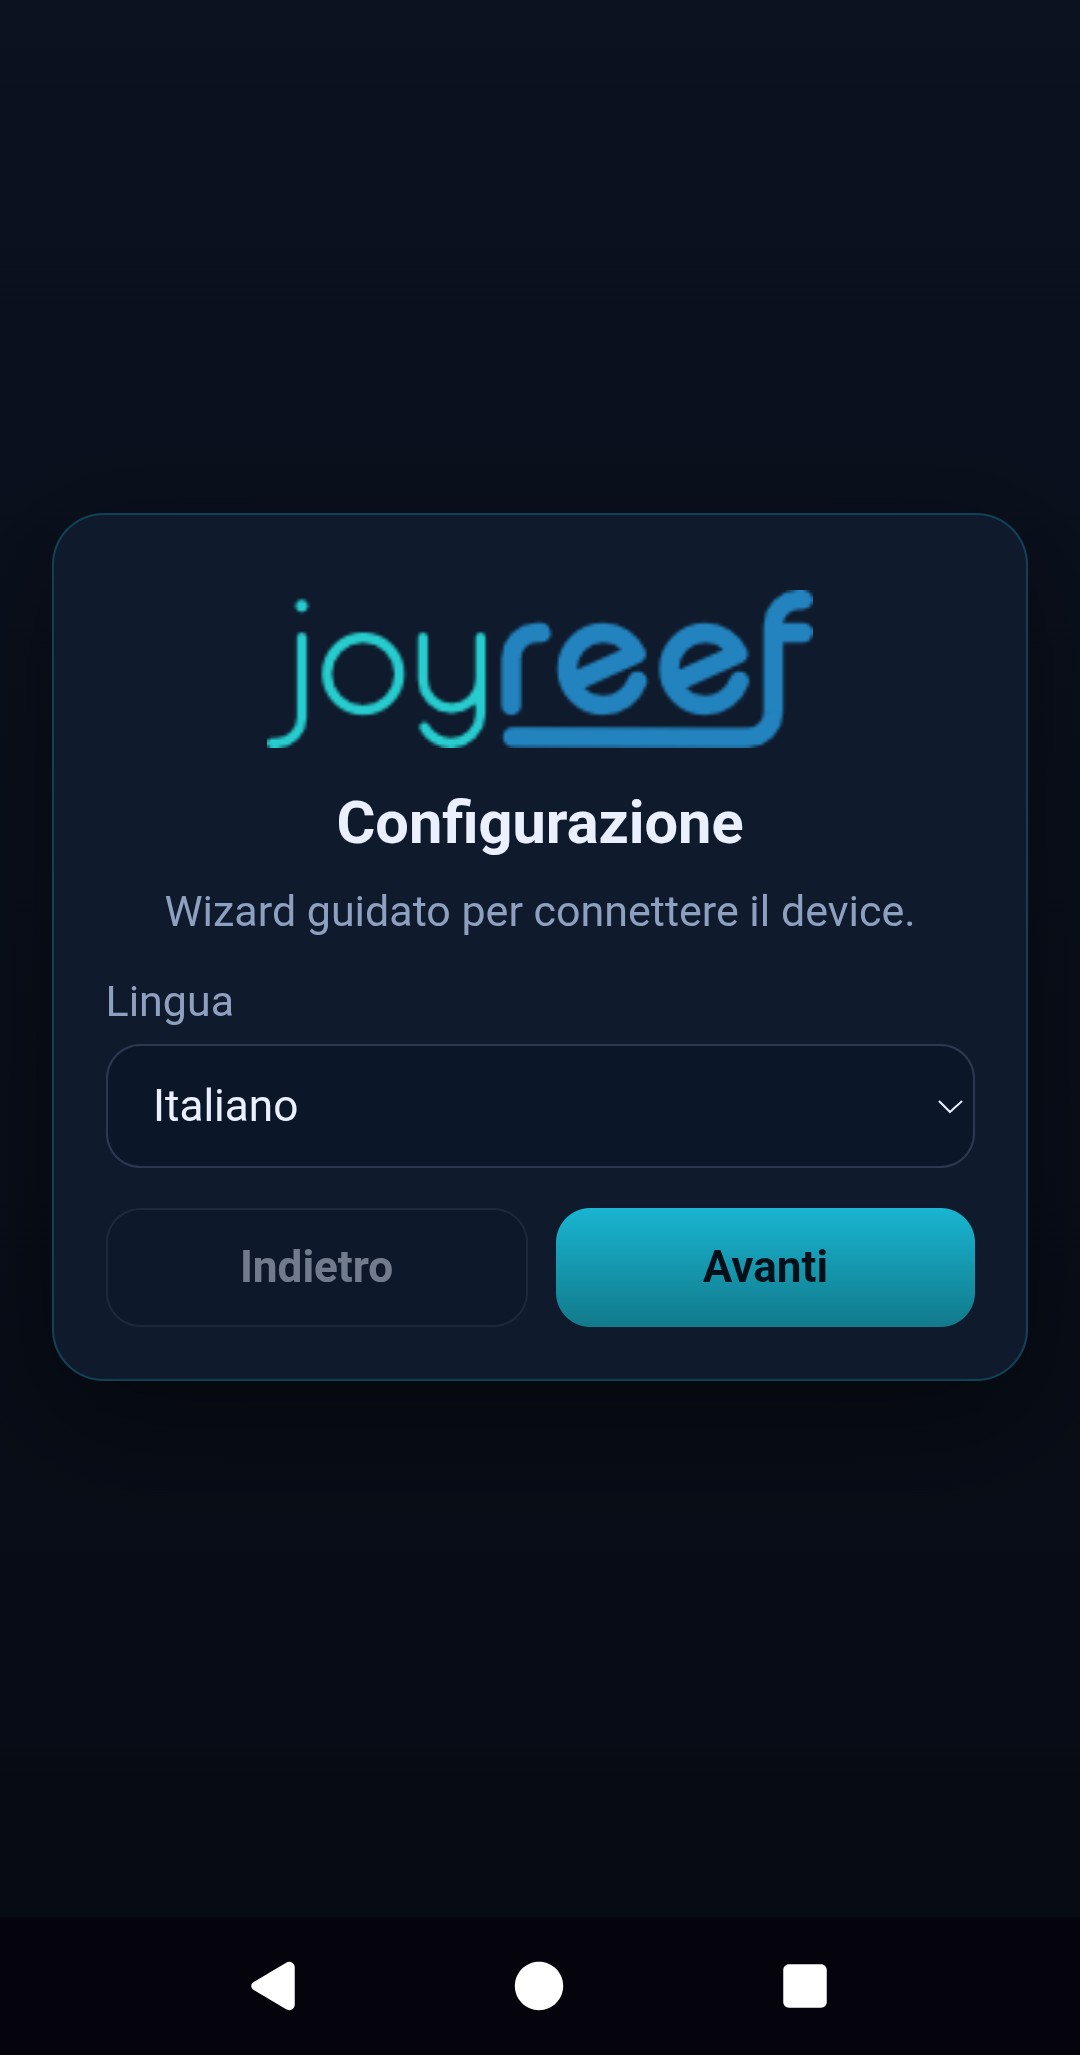
Step 3: fill out the wizard
The wizard has 3 screens.
Screen 1 — Language and Timezone
- Language: English (or your preference)
- Timezone: choose your timezone
Screen 2 — Home WiFi
- WiFi: select your network from the list (must be 2.4 GHz)
- WiFi Password: your network's password
- Press Test connection — if successful, the Next button appears
⚠️ JoyReef devices only support 2.4 GHz WiFi (not 5 GHz). If your router combines both bands into a single network, temporarily disable the 5 GHz band from the router's settings during setup. You can re-enable it once the device is connected.
Screen 3 — JoyReef Credentials
- Username: the email of your JoyReef account
- Password: your JoyReef account password
- Press Test connection — if credentials are correct, Save and Finish appears
Step 4: save
Press Save and Finish. The device:
- Saves settings to internal memory
- Turns off the
joyreef-XXXXXXnetwork - Reboots and connects to your home WiFi
Your phone will automatically disconnect from the device's network. Reconnect to your home WiFi.
4. Verify that the device is online
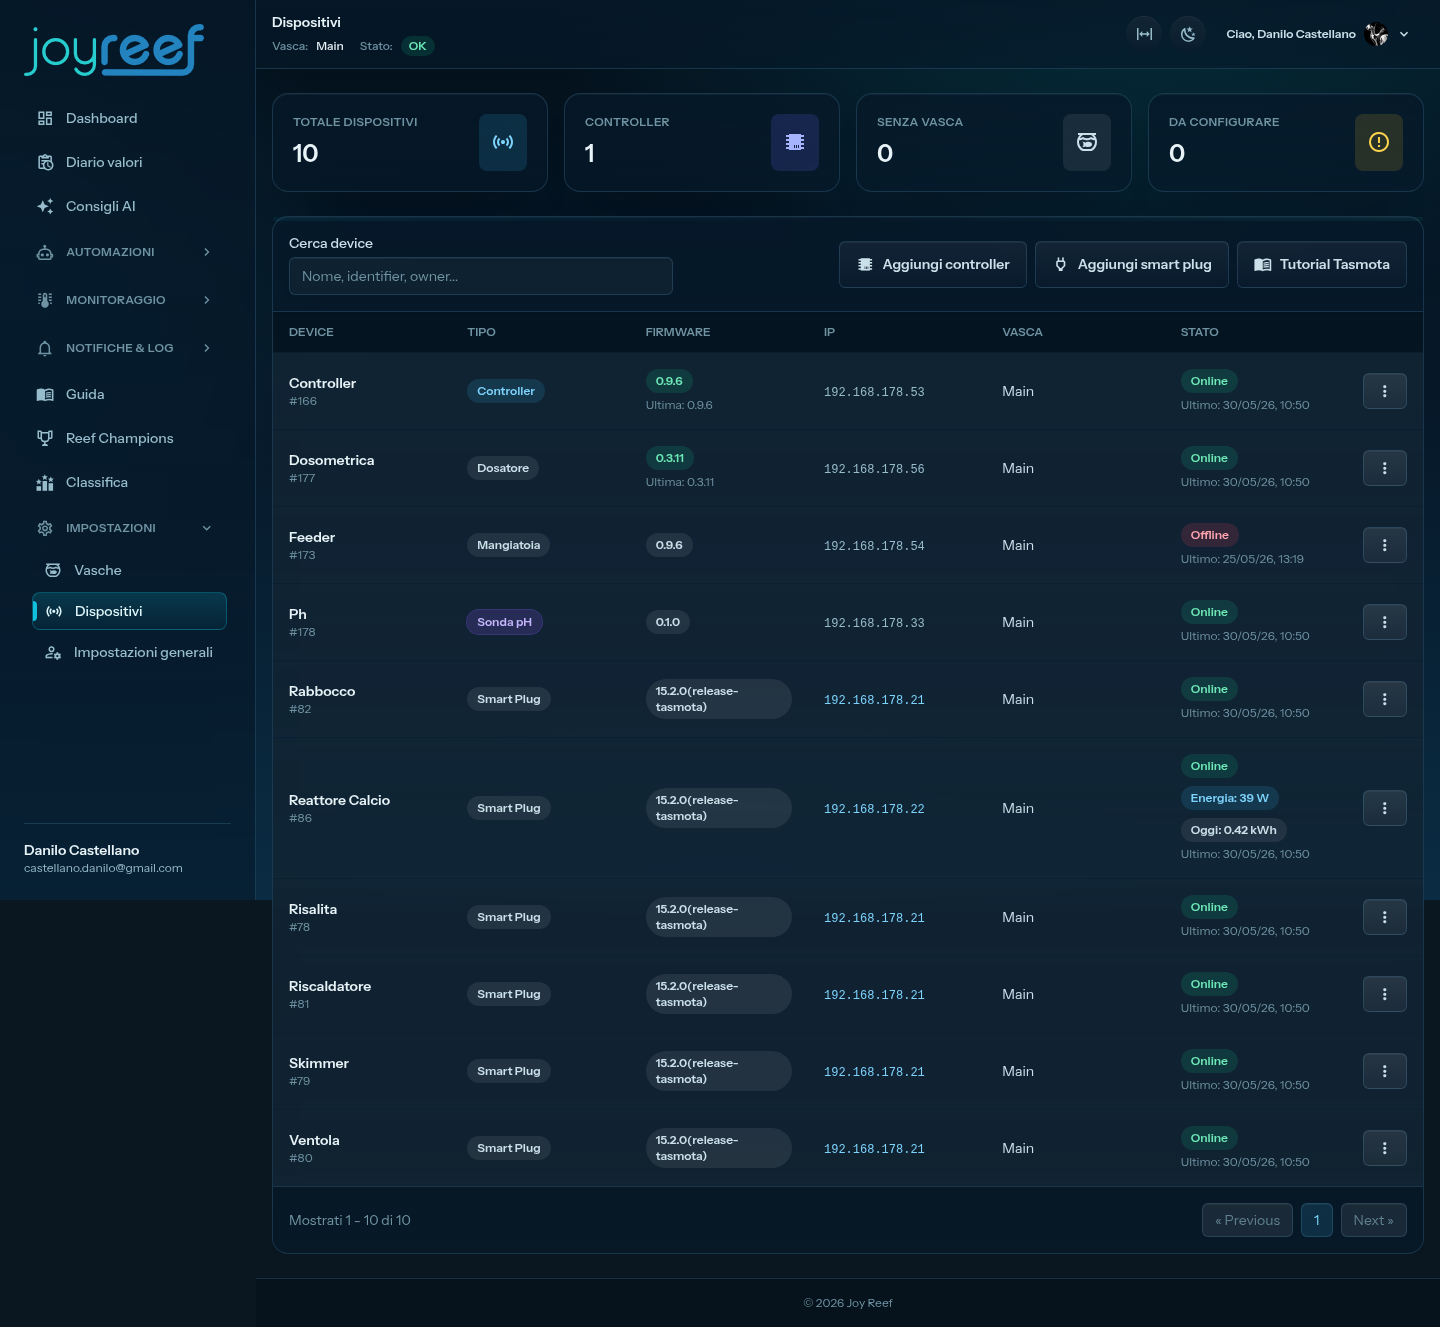
Portal
- Open portal.joy-reef.com and log in
- Go to Devices
- Your device appears in the list with the name
joyreef-XXXXXXand a green Online badge
The first connection can take up to 1-2 minutes.
If something goes wrong
| Symptom | Probable cause | Solution |
|---|---|---|
| Device does not appear in list after 2 minutes | Wrong WiFi password or 5 GHz network | Repeat the wizard: hold the reset button for 8 seconds and start from Step 1 of this section |
| Device appears but shows Offline badge | WiFi ok but not talking to portal | Verify the router has Internet access. If yes, JoyReef credentials are wrong: reset and reconfigure |
| Device appears Online but disappears after a few minutes | Weak WiFi signal | Move the device closer to the router during first setup |
JoyReef Guide · Questions? Write to us at supporto@joy-reef.com