Shopping list — what to buy to build the controller
Reading time: ~12 minutes · Audience: anyone who wants to build the controller from scratch
🟢 Fundamental Guide — mandatory onboarding path. Without it, the system will not start.
🗺️ Your JoyReef Path:
- Shopping list ← YOU ARE HERE
- Controller assembly
- Firmware + WiFi
- Tank and sensor configuration
- Tasmota smart plugs
- Automations (ATO, etc.)
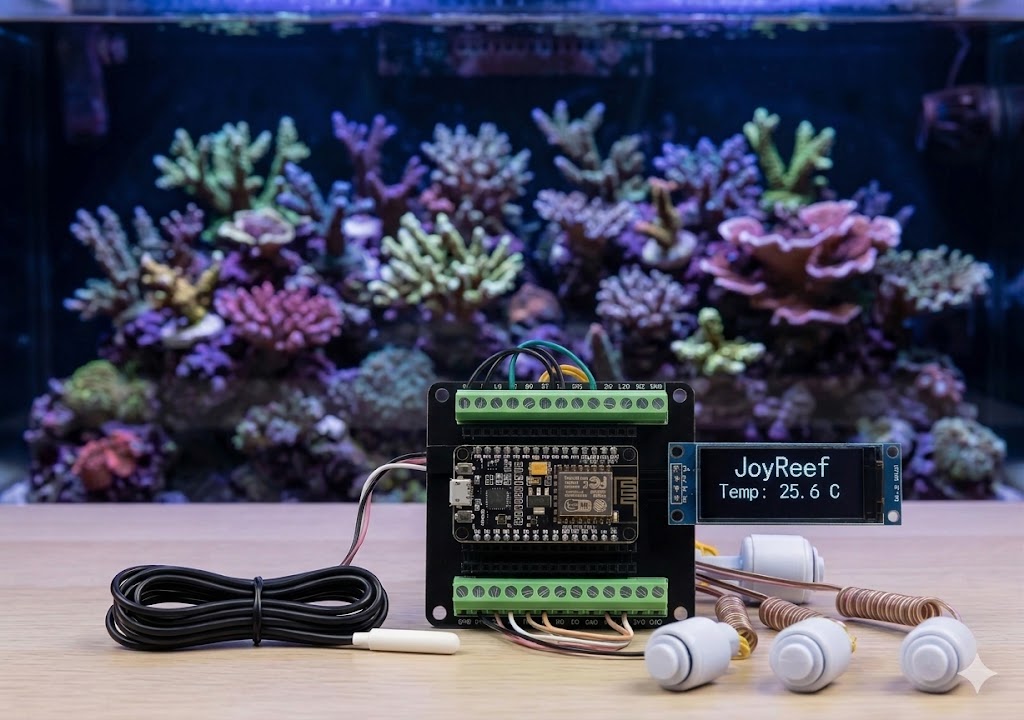
This is what you will get: the controller assembled and powered on next to the tank.
1. What you are about to build
A small control unit that keeps an eye on your tank 24/7 and alerts you on your phone if something goes wrong. It measures temperature, monitors water levels (for automatic top-off), and, connected to smart plugs, turns the heater, skimmer, and pumps on and off based on the sensors.
Total cost: from €50 (monitoring only) to €130 (full version with a dedicated pH device and all smart plugs). All components are purchased online.
Time: 15 minutes to place orders, then 30-90 minutes of assembly when the stuff arrives. No soldering required: a small expansion board is used where each NodeMCU pin becomes a numbered screw terminal. To connect a sensor, just strip the end of the cable, insert it into the correct terminal, and tighten the screw.
2. Basic Setup (≈ €30-35)
Everything you need for the minimum version: tank temperature, up to 4 level sensors (for automatic top-off), and a small screen that shows what's happening. Smart plugs are in a separate section later.
| # | Component | Qty | Price | Where |
|---|---|---|---|---|
| 1 | NodeMCU v3 — the "brain" of the controller, a small board with integrated WiFi | 1 | €4-7 | Amazon · AliExpress |
| 2 | DS18B20 temperature probe with plastic cap ⚠️ — waterproof thermometer with cable, to be inserted into the tank. Important: it must have a white PVC/plastic cap, not stainless steel. Probes with silver metal tips corrode in a few weeks in a marine aquarium and release toxic metals for corals and fish | 1 | €2-4 | AliExpress (tested model) |
| 3 | 4.7 kΩ Resistor — small component necessary for the probe to function. Costs a few cents but is indispensable | 1 | €0.05 | Often included in DS18B20 kits, otherwise Aliexpress |
| 4 | Float switches — switches that activate when water touches them. Used for automatic top-off and water changes | 4 | €1.5-3 each | Amazon · AliExpress |
| 5 | 128×32 OLED Display — small screen showing temperature and controller address. It's the component with the most wires to connect (4), but nothing complicated: we'll talk about it step-by-step in the assembly guide | 1 | €2-4 | Amazon · AliExpress |
| 6 | Expansion board (screw shield) for NodeMCU v3 — base with a screw terminal for each NodeMCU pin. You place the NodeMCU on top and each pin becomes a numbered screw ready to receive a wire. ⚠️ Make sure it's the v3 version: the NodeMCU v3 has its two pin rows further apart than the v2, and it won't fit a narrow shield unless you force the pins inwards | 1 | €4-8 | Amazon · AliExpress |
| 7 | Cable / Jumper set M/F + M/M — to connect the display and float switches to the board. You often already have some at home, otherwise, one kit is more than enough | 1 set | €3-5 | Amazon · AliExpress |
| 8 | 5V 2A USB Power Supply — a common phone charger. 1A is not enough (the controller resets under WiFi load) | 1 | €5-8 | You probably have one at home, otherwise Amazon |
| 9 | Micro-USB data cable — Android phone cable, must be "data", not just charging | 1 | €1-3 | Amazon |
Total: €35-40 if you buy everything, ~€28-30 if you already have the charger and cable at home.
💡 Want a more complete solution? In the advanced setup below you will also find: factory reset button, the dedicated pH device (probe + ADS1115 + ESP board), industrial power supply, 3D printed case.
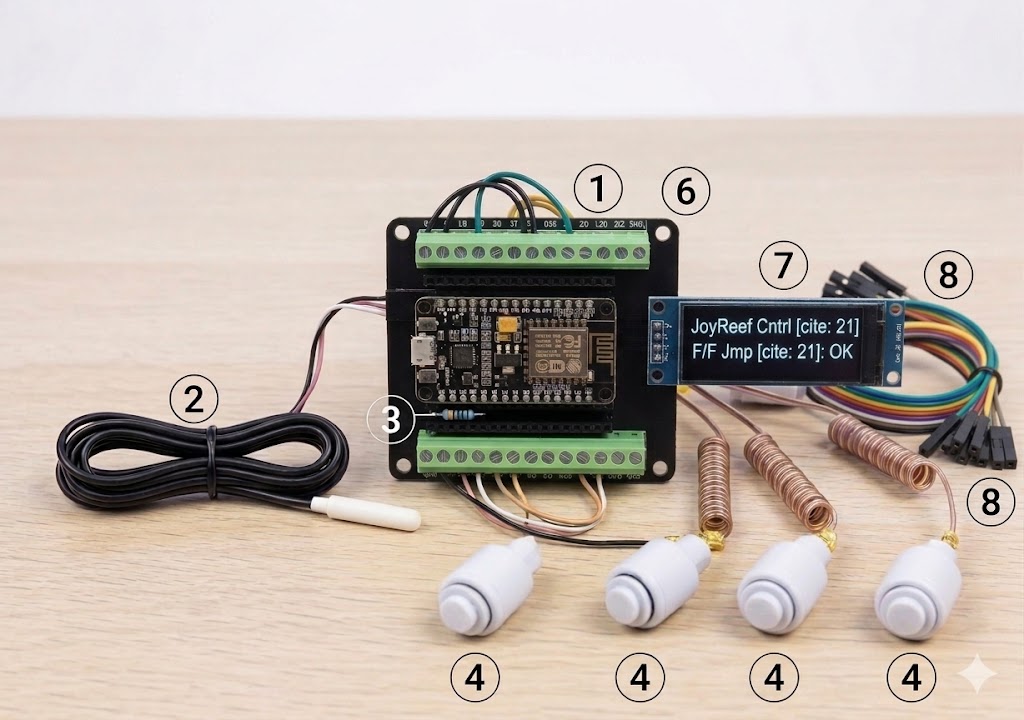
The basic setup components, so you can recognize them when the packages arrive.
3. Advanced Setup (optional components, +€20-50)
All items here are optional and independent: buy only what interests you, you don't need to get everything at once.
💡 pH is now a separate device. The pH components below (probe, ADS1115, buffers) no longer connect to the controller: together with their own ESP board they form a dedicated pH device, separate and standalone. One probe = one device. If you want to monitor pH (or feed a calcium reactor / KH titration) start from guide 18 — pH Device, which explains assembly, flashing, and calibration.
| # | Component | What it's for | Price | Where |
|---|---|---|---|---|
| 1 | Button | Allows for hardware factory reset (useful if you change WiFi and lose credentials). Without it, the only possible reset is to reconnect via USB and reflash | €0.20 | Amazon · AliExpress |
| 2 | DFRobot SEN0161-V2 pH probe ⭐ | Measures water acidity, fundamental for those keeping SPS. It is part of the dedicated pH device (guide 18), it does not connect to the controller. Needs to be calibrated every 2-3 months with the fluids below | €25-40 | Amazon · AliExpress · DFRobot Store |
| 3 | ADS1115 Module | The ADC that reads the pH probe (the ESP board alone cannot read precise analog signals). Connects with 2 wires (I2C) to the pH device board | €2-4 | Amazon · AliExpress |
| 4 | ESP board for the pH device (NodeMCU v3 / Wemos D1 mini) | The "brain" of the dedicated pH device: a standalone board (an ESP32-S3 as an alternative). No more pH probe on the controller: each probe has its own board | €3-5 | Amazon · AliExpress |
| 5 | pH 4.01 + 7.00 Buffer | Standard liquids to calibrate the pH probe. One pouch lasts 1-2 years if well-sealed | €4-8 | Amazon · AliExpress |
| 6 | Meanwell HDR-15-5 Power Supply | Professional power supply, more reliable than a phone charger. Useful if you put the controller in an electrical panel | €8-15 | Amazon · AliExpress |
| 7 | 3D printed case or IP65 electrical box | Container to close everything neatly. If you have a 3D printer, you can find free models on Thingiverse (search for "ESP8266 NodeMCU OLED case") | €5-10 | Amazon (electrical box) |
| 8 | Screw terminal blocks / Wago connectors | Allow you to disconnect and reconnect sensors without soldering. Convenient for maintenance | €0.30 each × 4-8 | Amazon · AliExpress |
⭐ = the one that makes the most difference if you get it. If you want pH, remember it's a complete package: pH probe + ADS1115 + dedicated ESP board + calibration buffers together form the pH device (guide 18).
💡 Want a permanent solution? If you are more experienced and want a "definitive" controller with components soldered onto a perfboard instead of screw terminals, write to us at supporto@joy-reef.com. We are preparing a dedicated guide.
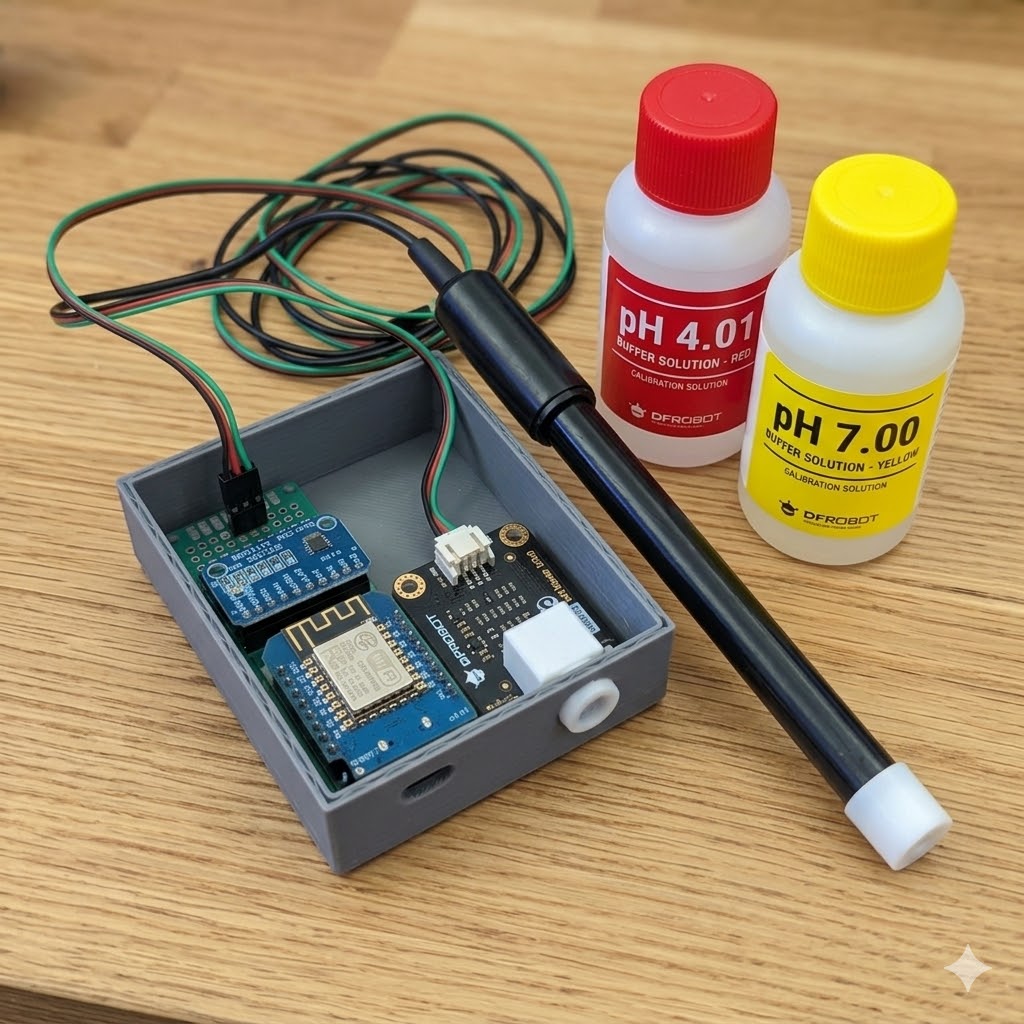
The complete pH device package: probe + ADS1115 + ESP board + calibration buffers.
4. Smart plugs (Tasmota)
Smart plugs are normal adapters that plug into the socket behind the device (heater, pump, etc.) and allow the JoyReef controller to turn it on and off via WiFi. They are the piece that makes the system "intelligent": without these, the controller can only read sensors and alert you, but it cannot intervene on its own.
How many you need
It depends on how much you want to automate:
| Want JoyReef to manage... | Plugs needed |
|---|---|
| Only temperature monitoring + levels (no automation) | 0 plugs — you don't have to buy them |
| Automatic Top-Off (ATO) | 1 plug (for the ATO pump) |
| ATO + thermal safety (shuts off heater if too hot) | 2 plugs (ATO pump + heater) |
| Typical complete setup | 5 plugs: heater, ATO pump, skimmer, return pump, lights |
Recommended model
| Nous A1T ⭐ | |
|---|---|
| Price | €12-15 |
| Pre-configured Tasmota | ✅ yes, from the factory — ready in 2 minutes |
| Power monitoring (watts) | ✅ yes, tells you how much the connected device consumes |
| Plug | Italian / EU standard |
| Where | Amazon |
Buy the Nous A1T directly: they already come with Tasmota installed, you just need to connect them to WiFi and enter the MQTT data. All other alternatives require technical steps (soldering, disassembly) outside the scope of this guide.
Alternatives (if Nous A1T are out of stock)
| Model | Price | Notes |
|---|---|---|
| Athom EU Plug Tasmota | €14-17 | Nous equivalent, also pre-flashed. Amazon |
❌ What NOT to buy
- Shelly Plug — it's a different brand, proprietary firmware, not compatible with JoyReef
- Generic "smart" plugs (TP-Link Kasa, Meross, Tuya, eWeLink) — use proprietary apps, do not talk to JoyReef
- Models to flash by hand (BlitzWolf SHP-15, Sonoff S31, Sonoff Basic) — require opening the plug and soldering, too much for a first project
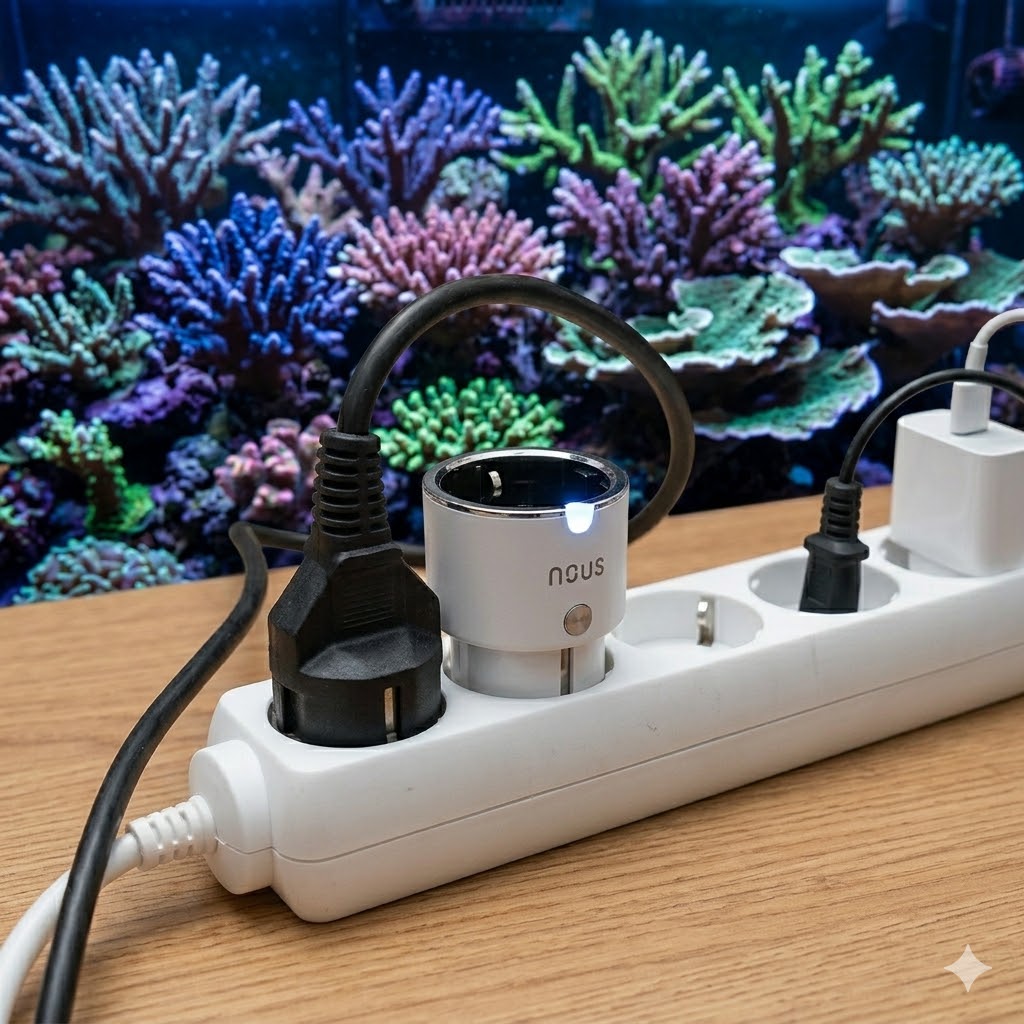
The Nous A1T smart plug: the piece that makes the system "smart."
5. What NOT to buy (anti-shopping list)
You might see advice on forums, Reddit, or YouTube videos pushing components that do not work or are not needed with JoyReef. Here they are, so you save money and frustration.
| Component | Why avoid it |
|---|---|
| DS18B20 probe with stainless steel cap | ⚠️ Toxic for marine aquariums: stainless steel corrodes in salt water in weeks and releases metallic ions harmful to corals and fish. Buy only models with PVC/plastic caps (see section 2) |
| 4-channel relay module to solder to NodeMCU | ⚠️ Dangerous: brings 230V directly onto the controller electronics. To turn devices on/off ALWAYS use Tasmota smart plugs (section 4) |
| ORP/Redox probe | Not yet supported by firmware (on the roadmap) — don't buy it now |
| Salinity/conductivity probe | Same thing, not yet supported |
| "Professional" temperature probes PT100/PT1000 + MAX31865 | Needed in laboratories (accuracy 0.05 °C). For a reef tank, the DS18B20 (section 2) is more than enough |
| Color TFT display | The OLED screen in section 2 already shows everything needed (temperature, IP). A larger display would consume resources without adding value |
| Mechanical flow sensor (YF-S201 and similar) | Not supported by firmware. For now, return flow is managed manually |
⚠️ Important on safety: all 230V switching must happen inside certified smart plugs (section 4). Never connect relays or switching modules directly to the controller — the NodeMCU works at 3.3-5 V and connecting 230V means risk of shock, fire, and death of the controller (in this order of severity).
6. Times and where it's convenient to buy
You have two main options, based on how impatient you are:
| Where | Time | Price | When to choose it |
|---|---|---|---|
| Amazon.it (or Amazon.de) | 1-3 days | Reference | You want to start soon, you have Prime, you don't mind paying a bit more |
| AliExpress (standard shipping) | 15-30 days | -30/-50% vs Amazon | You have time, you want to save, nothing urgent |
What I would do: order the main components (NodeMCU, DS18B20 probe, display, pH probe) on AliExpress to save, and get only the 2-3 things I need to start right away on Amazon — usually the power supply, float switches, and smart plugs, so in the meantime I can start familiarizing myself with the portal and configuring them.
💡 Tips for AliExpress - Choose sellers with at least 10,000 orders and 97% positive feedback - Free "Standard Shipping" is usually 15-30 days. For €2-5 more they offer "Premium" which arrives in 7-15 days - If you order multiple components from the same seller, it costs less (combined shipping) - Don't buy pH calibration buffers on AliExpress: they often arrive expired or damaged — get them on Amazon or at an aquarium shop
7. Ordered everything? What to do now
Well done, first part done. While you wait for the packages (1-3 days if Amazon, 2-4 weeks if AliExpress), you can already:
- Create your JoyReef account at portal.joy-reef.com — it's free, no credit card required
- Familiarize yourself with the dashboard by looking around: you'll see that without a connected controller it's empty, but you can already explore sections and understand where the data will go
As soon as your stuff arrives:
- Open the First start of the controller guide: it's a step-by-step 30-60 minute path that takes you from screwing components onto the board to seeing the first temperature reading on the dashboard.
✅ Quick checklist before starting assembly: you have (a) all components from section 2, (b) the charger and USB cable, (c) a computer with Chrome or Edge to load the firmware via browser. If yes, you're ready.
🛠️ Couldn't find the DS18B20 probe with a plastic cap? Write to us at supporto@joy-reef.com — we're preparing a guide to build it yourself starting from the bare sensor.
Happy reefing!
JoyReef Guide · v1.0 · Questions? Write to us at supporto@joy-reef.com